
Instructor Calendar General Concepts
On your instructor calendar you'll find navigation tools and buttons. The general concept is to navigate to a day where you would like to book for a customer.

This example uses Friday at 10 AM for the appointment.
Click on the calendar on that time spot on Friday to start the Create Appointment process.
Next, search the database to find the customer for whom you would like to book an appointment. If they are not in the database, use the Create New Customer button to set up a new profile for the customer.
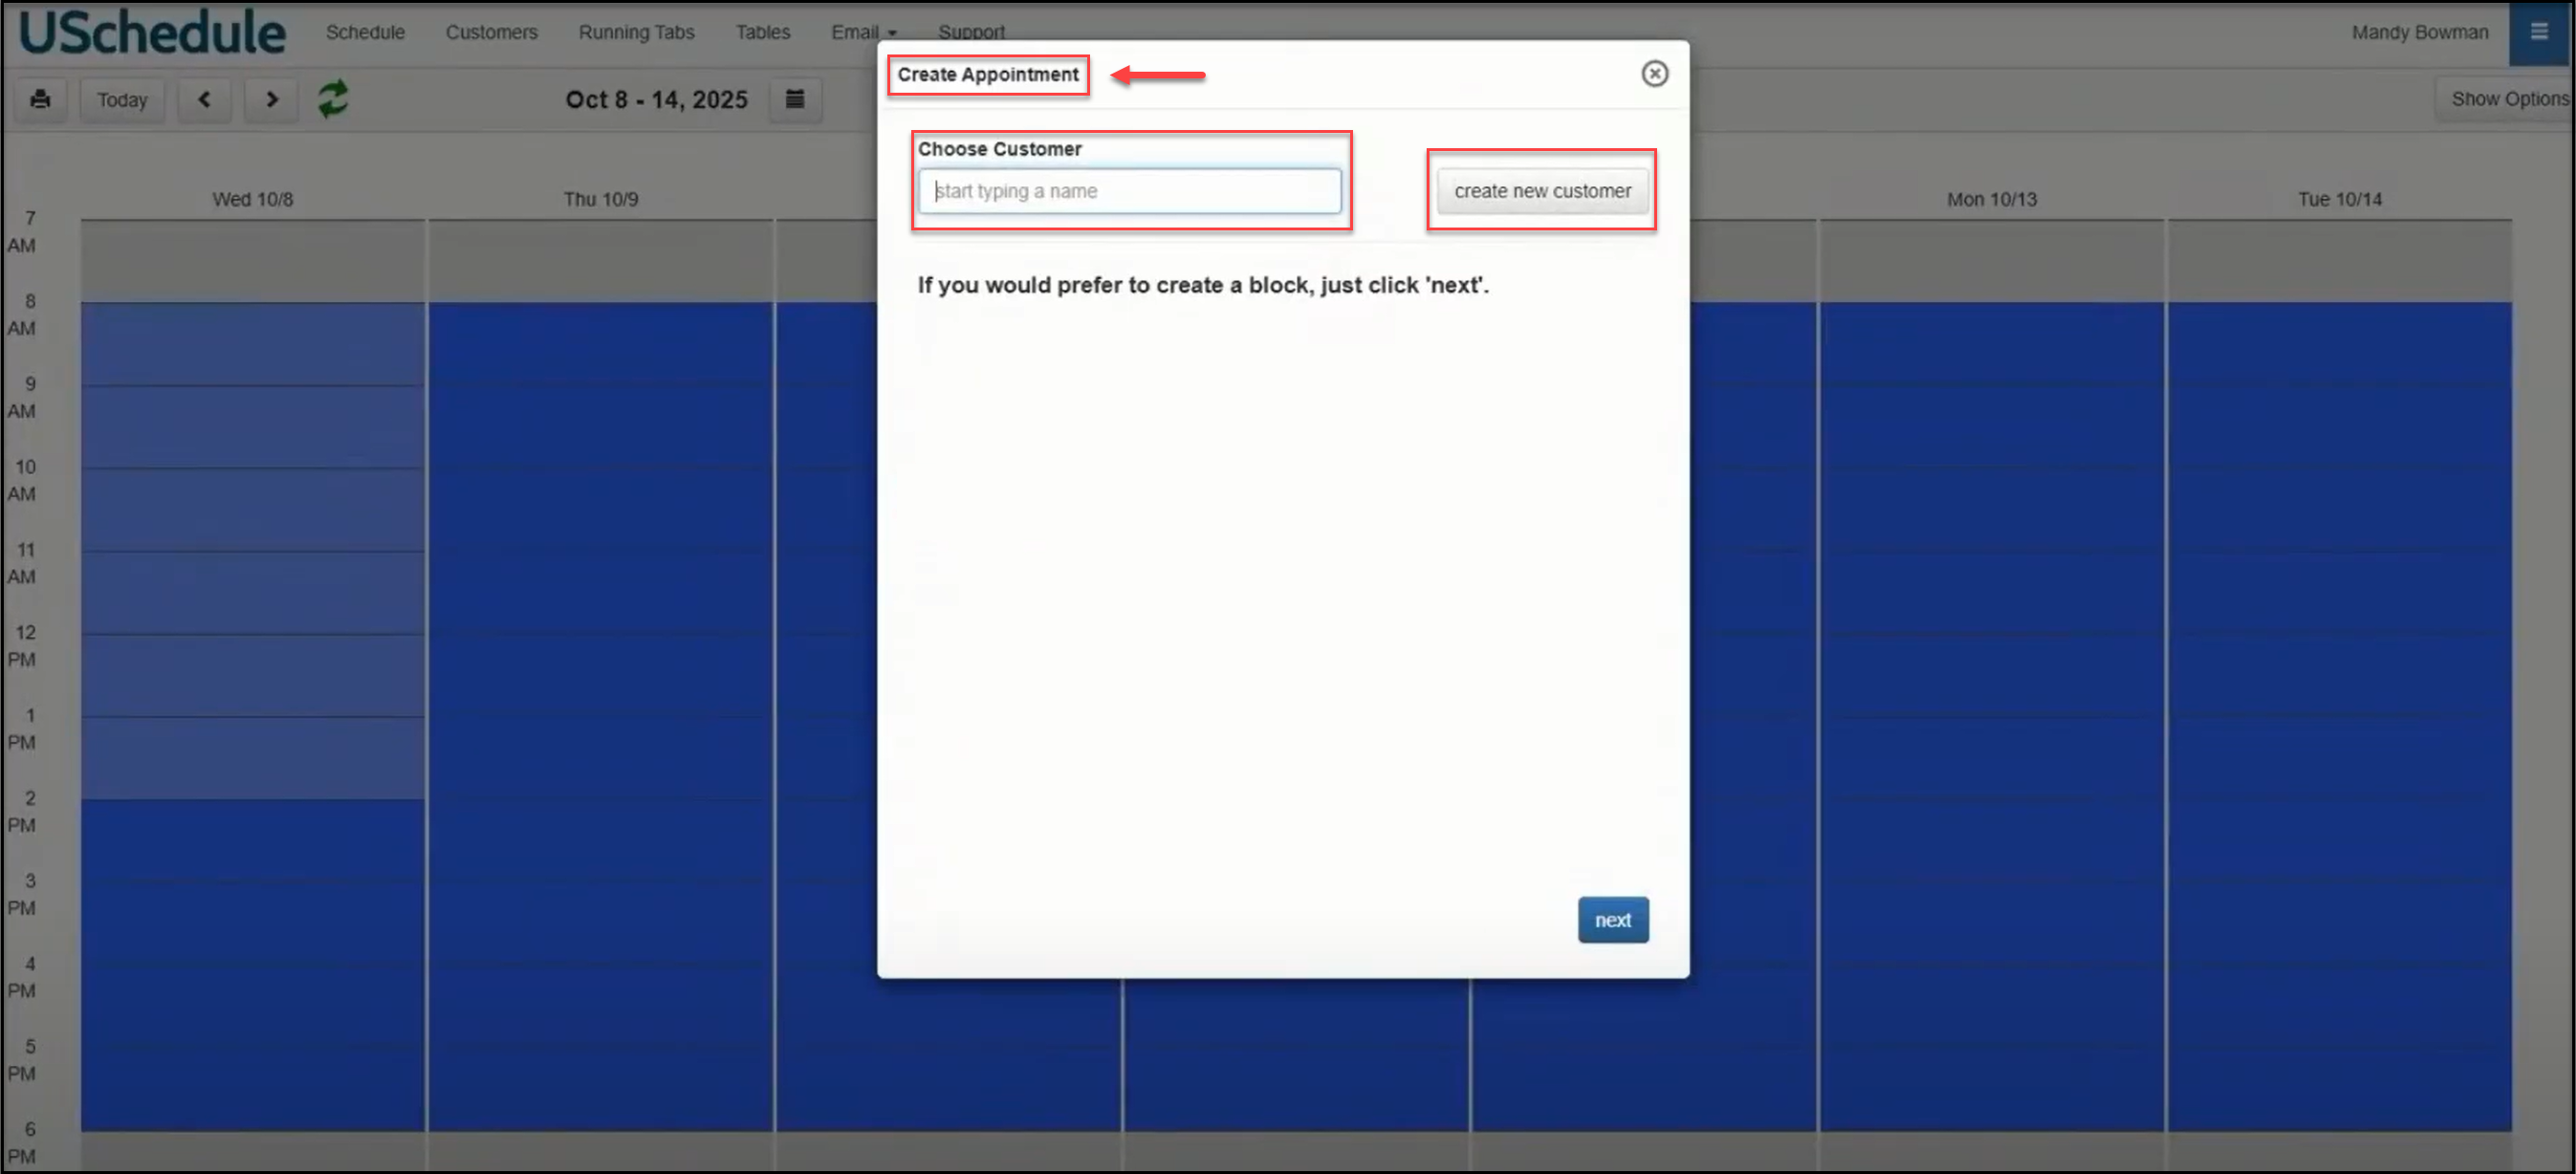
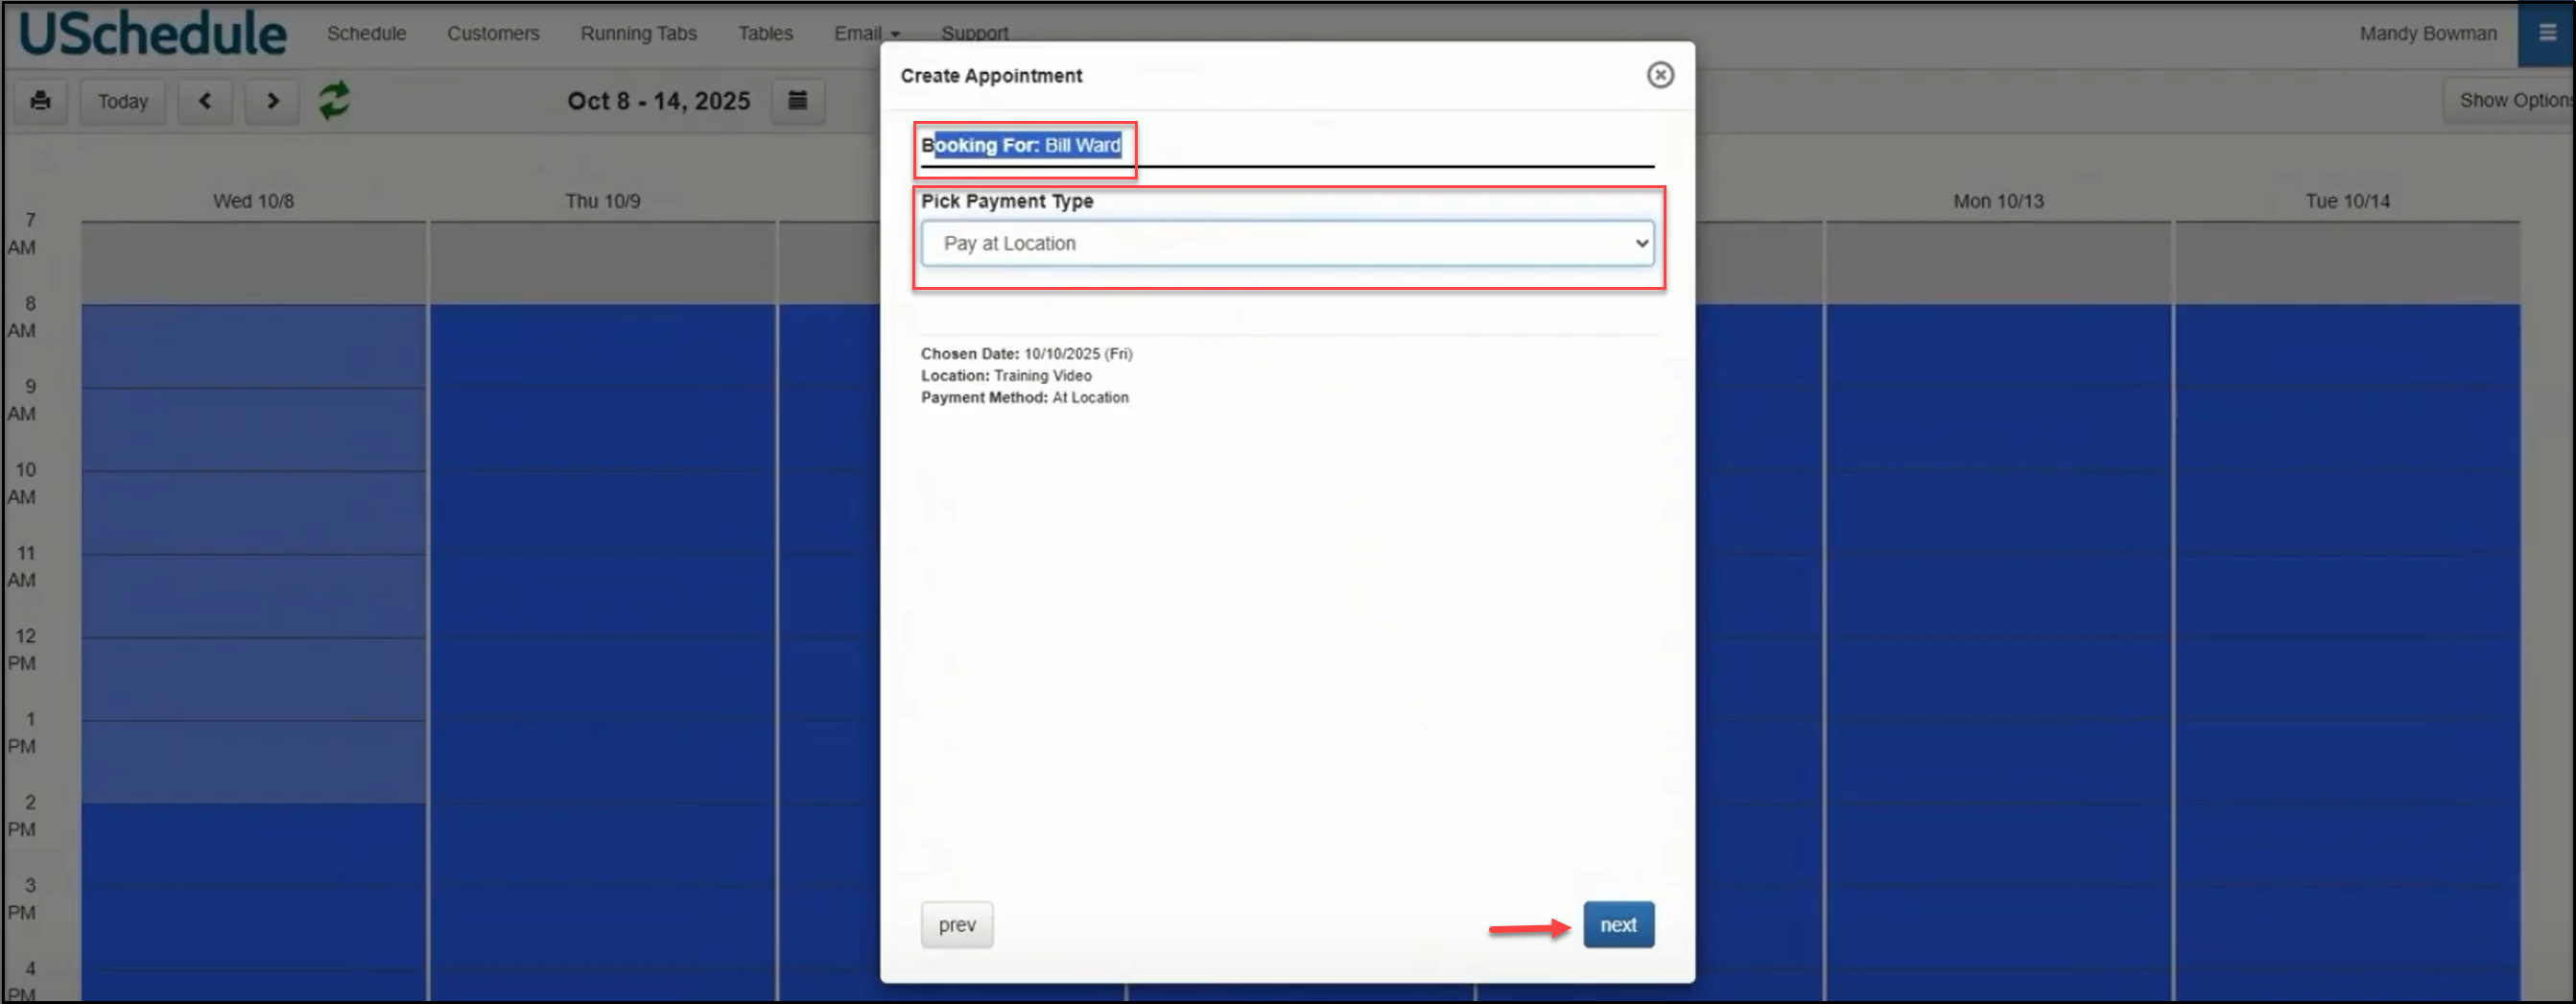
Once you find the customer in the database, click on their name. Next choose a payment option:
Apply Payment Now or Pay at Location. For this example, we will choose Pay at Location, which means the customer will pay at the time of the appointment or at the end of the appointment. Click Next.
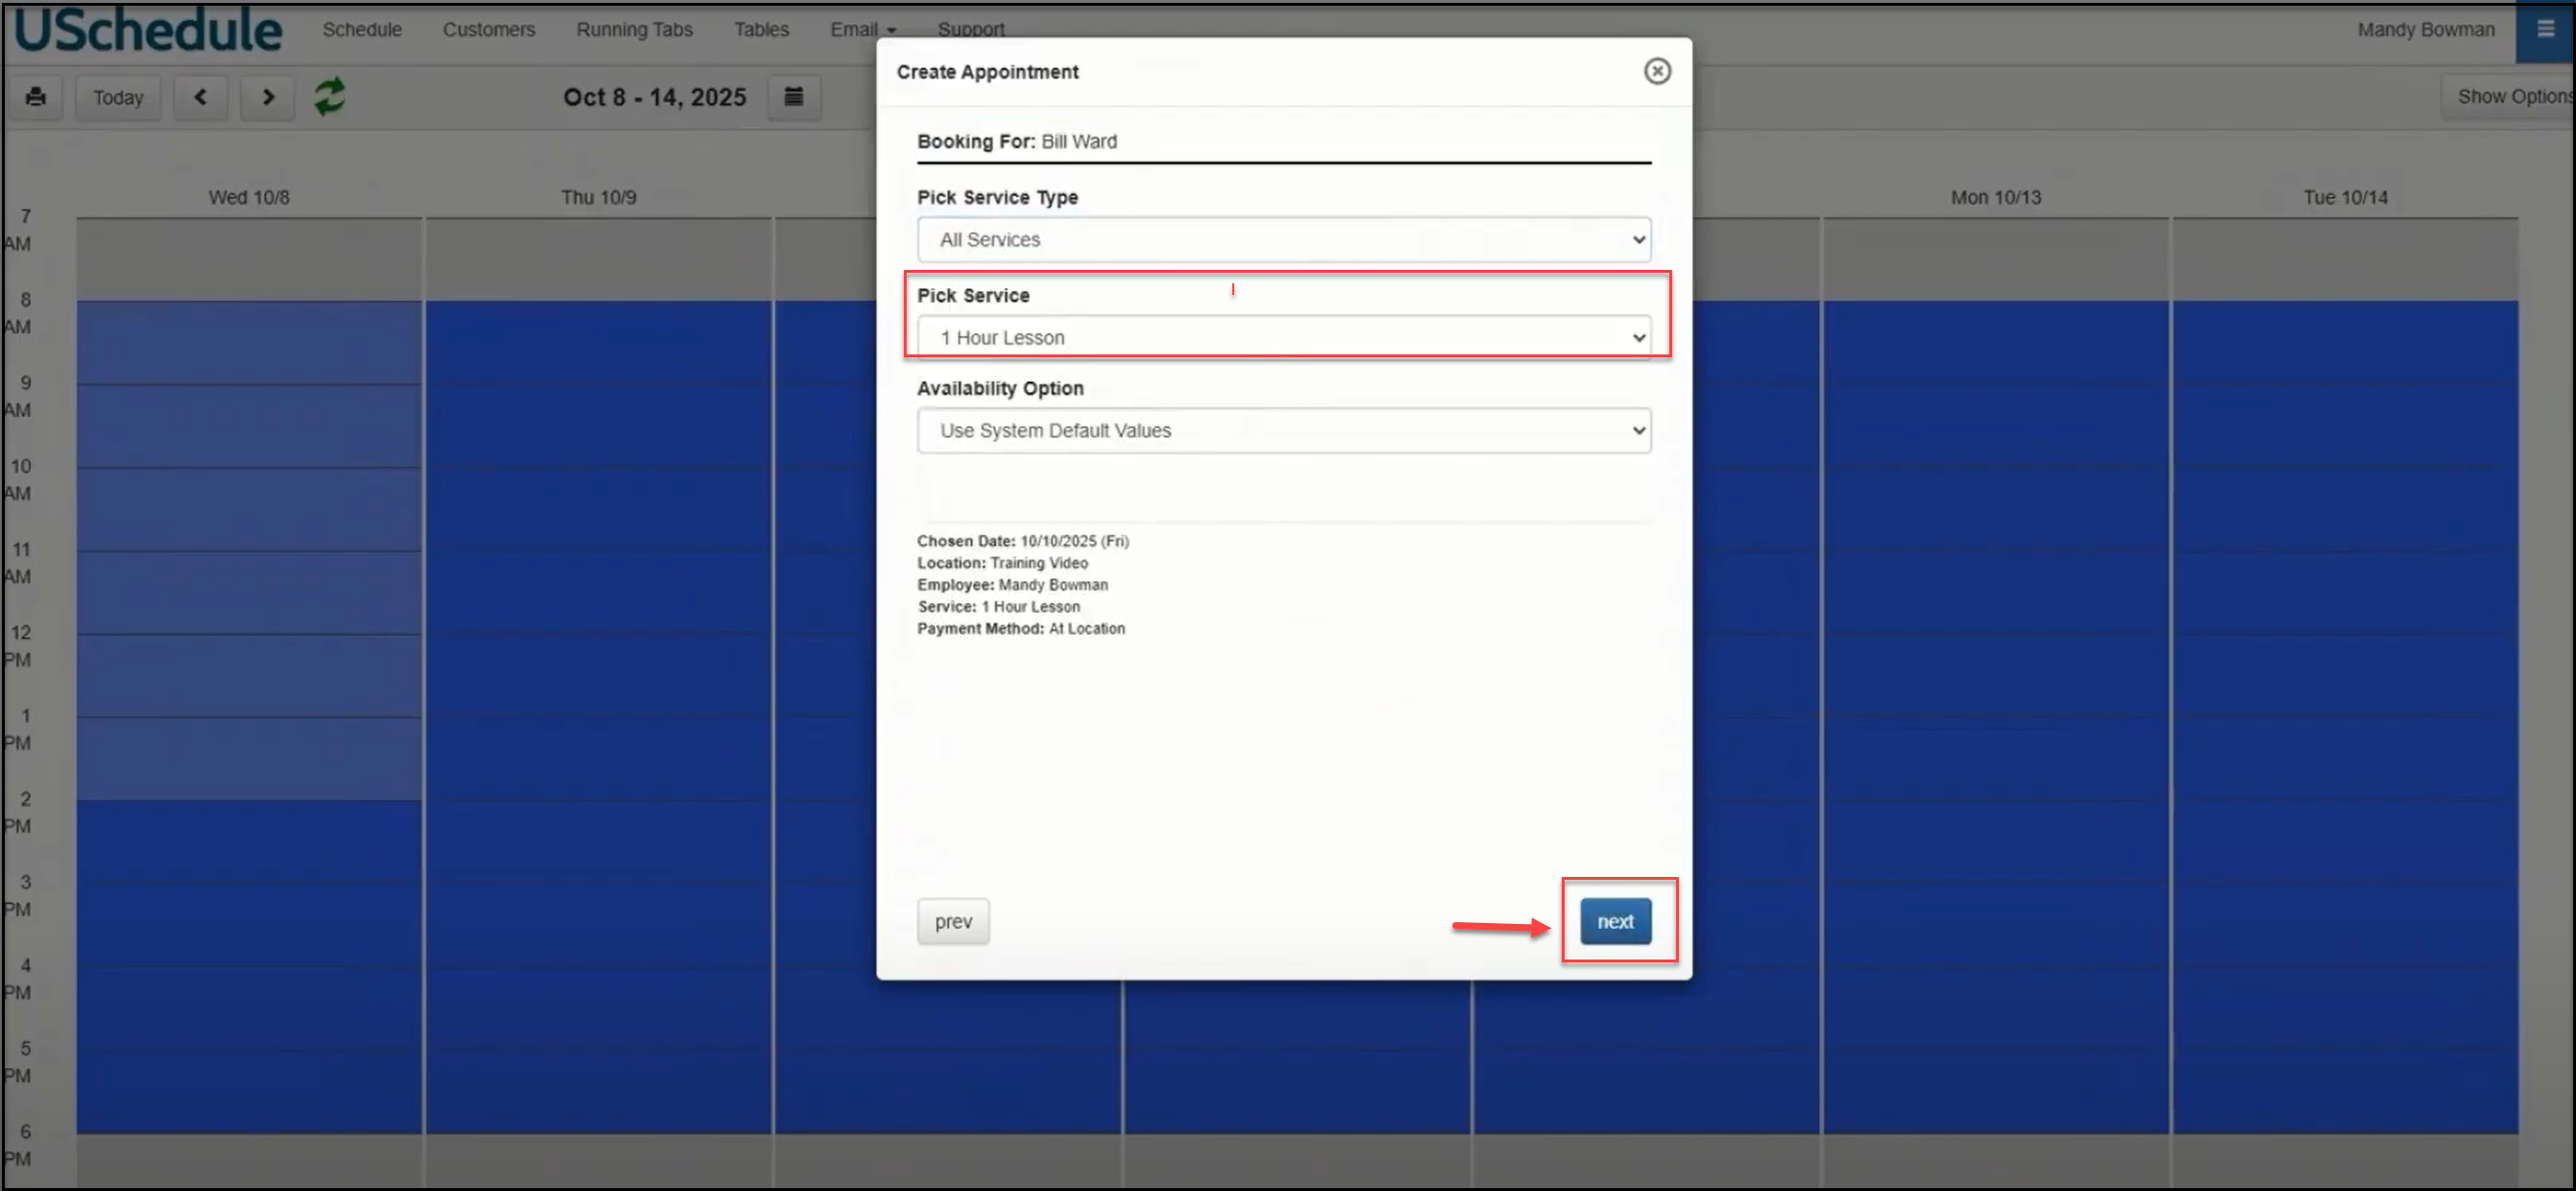
Choose the Service you would like to book and click the Next button:
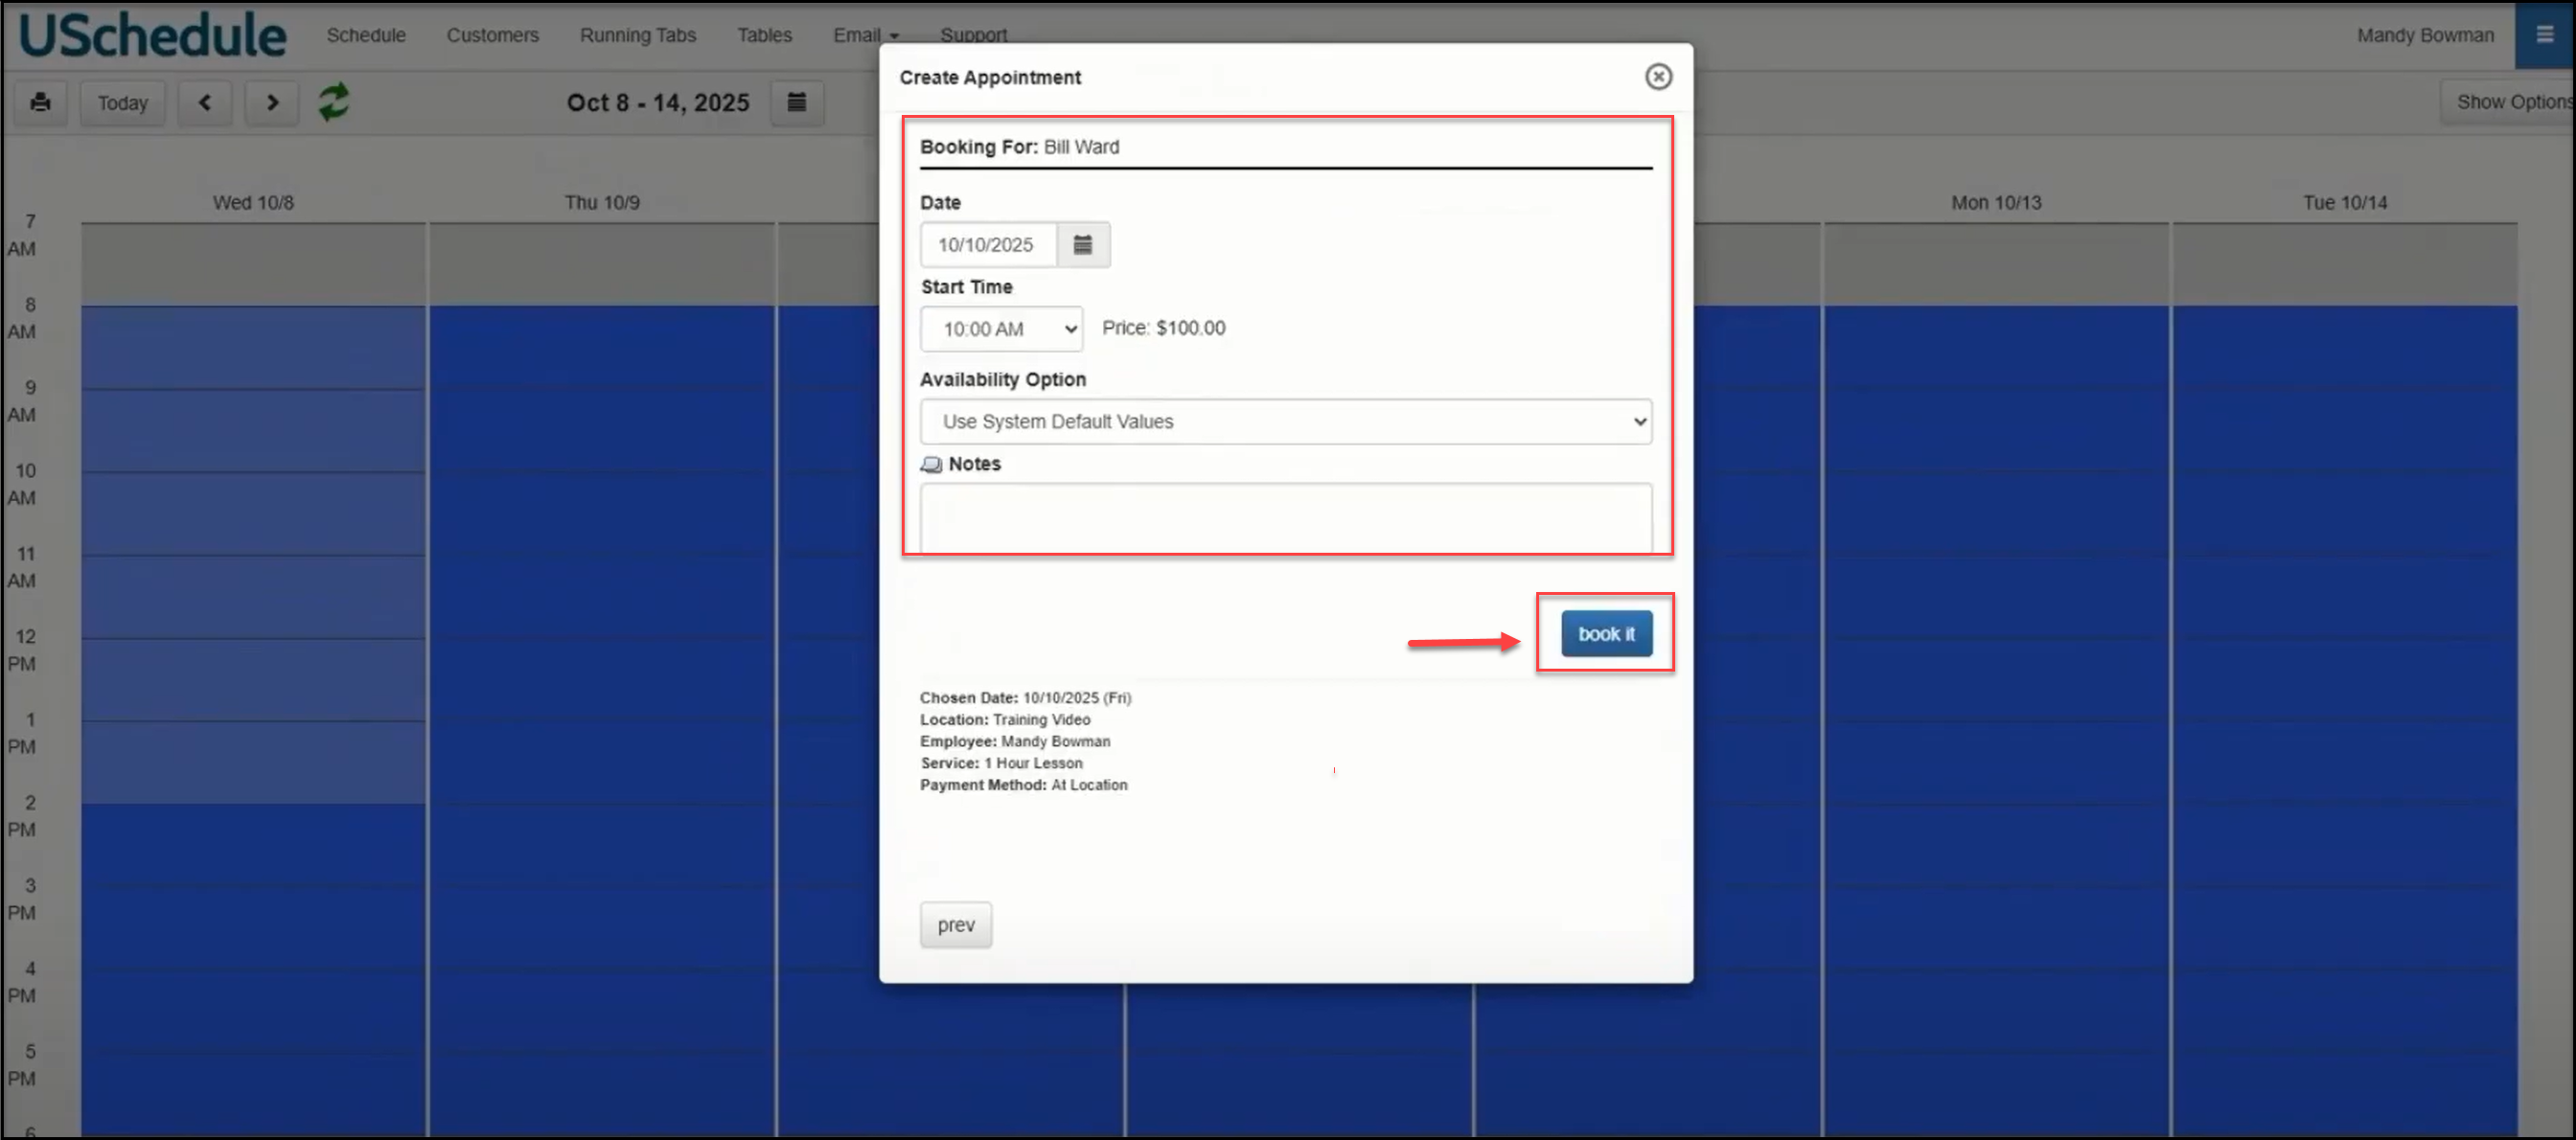
Before booking, double check your details. The click on the calendar sets the date and start time; make sure that is correct. Change that here if you need to.
Click the book it button to finish the process.
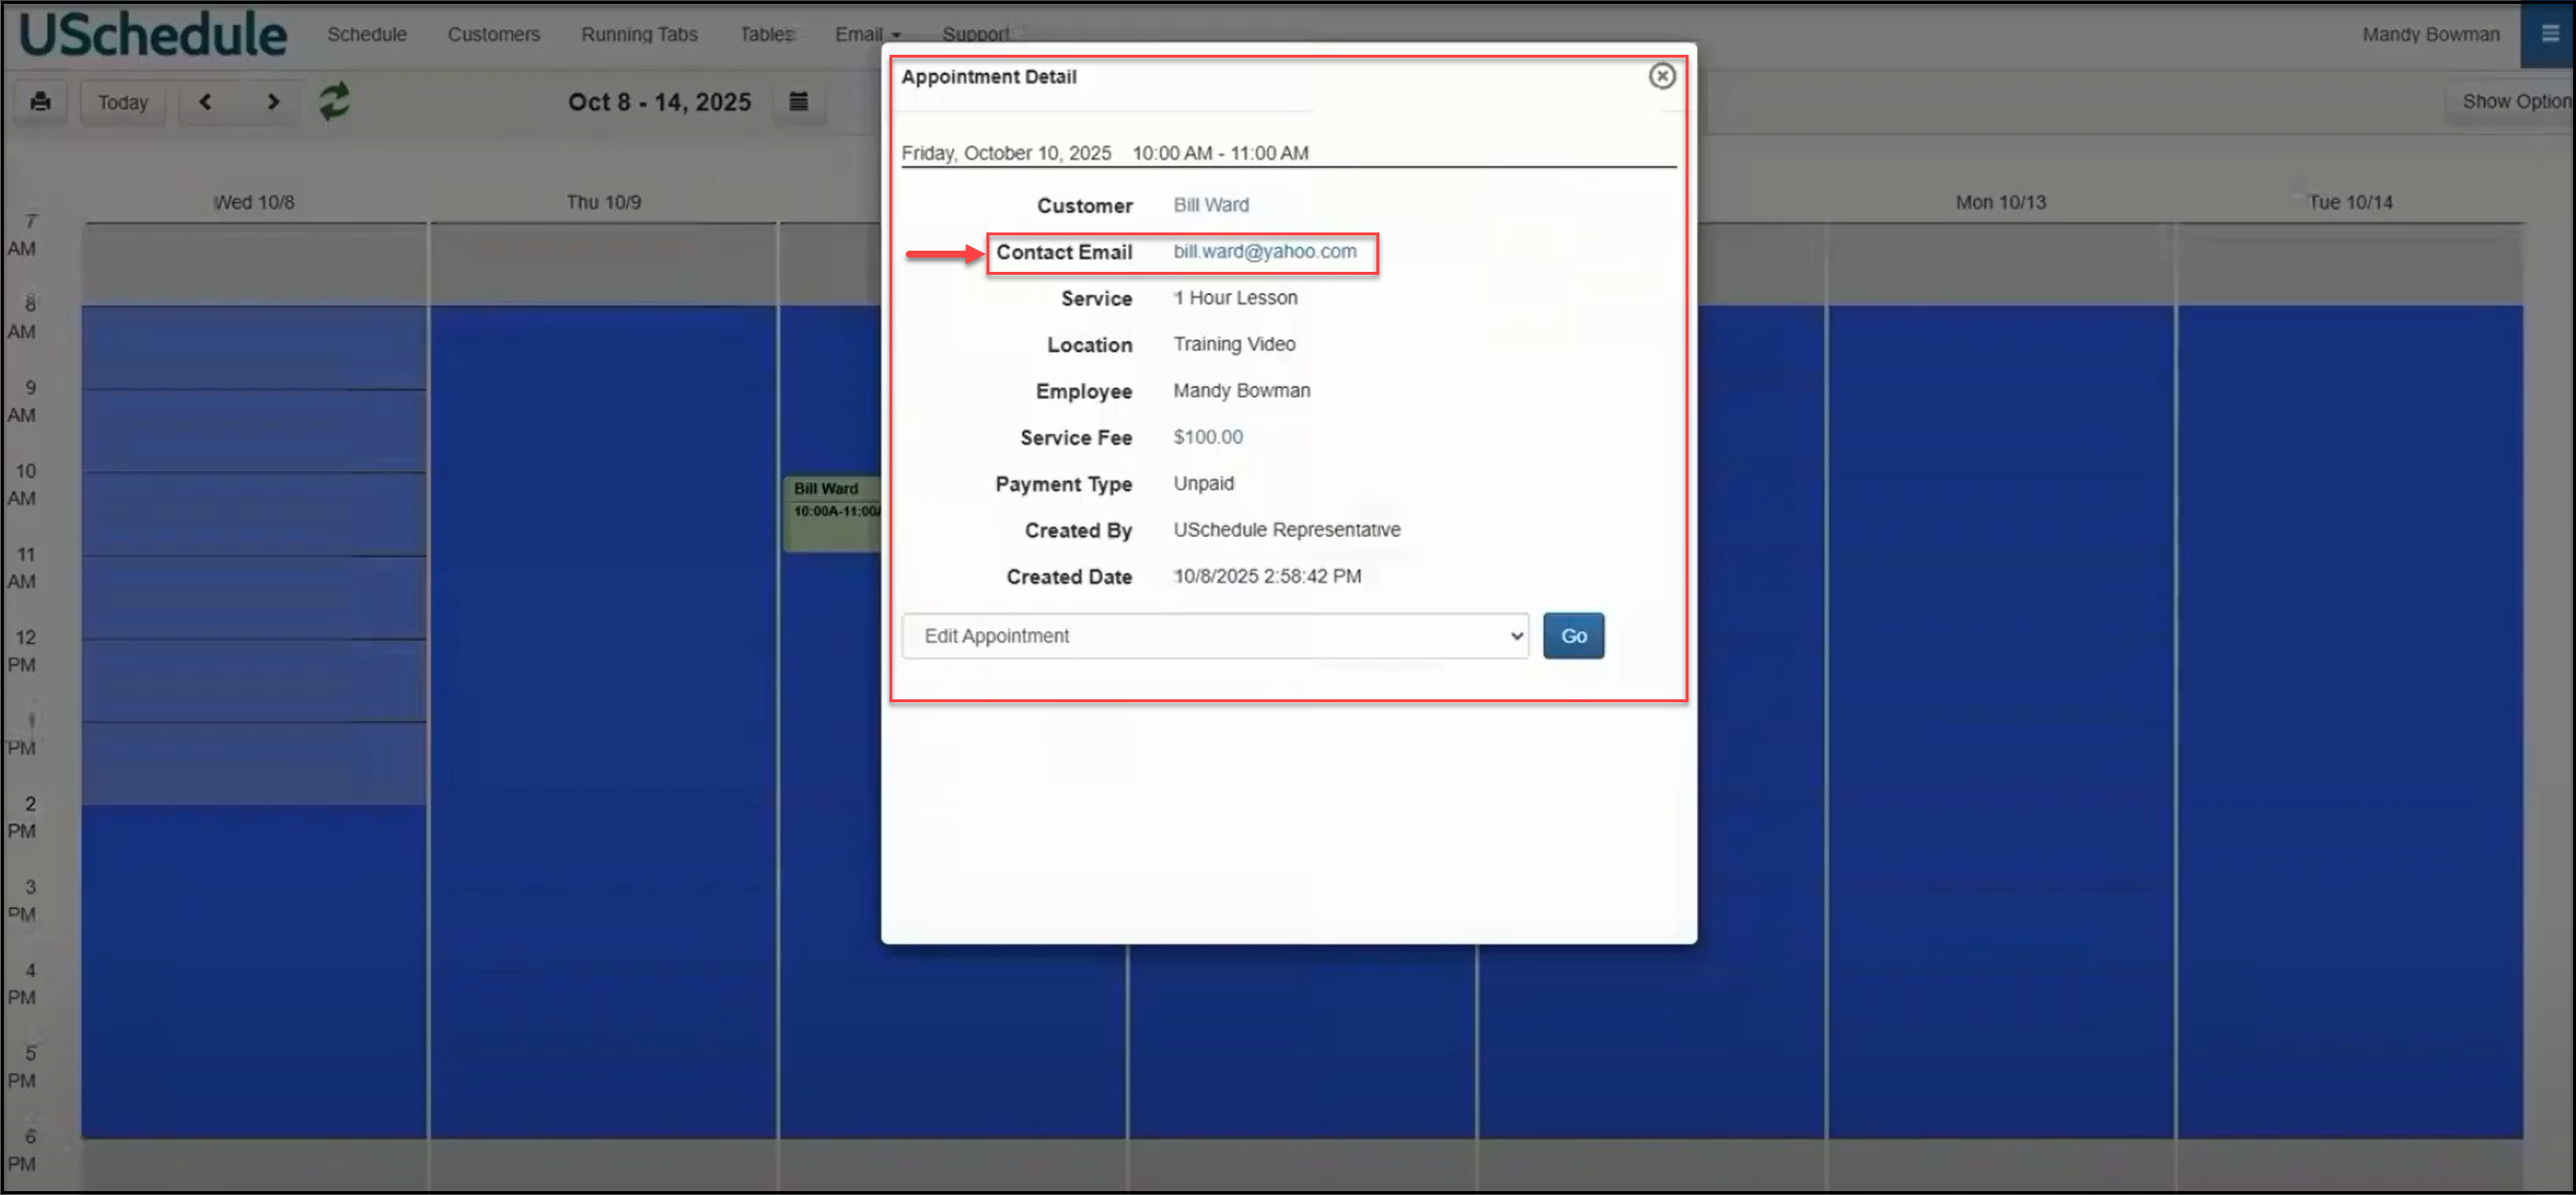
The appointment will appear on the calendar:

Click on the appointment to send an email confirmation to the customer:
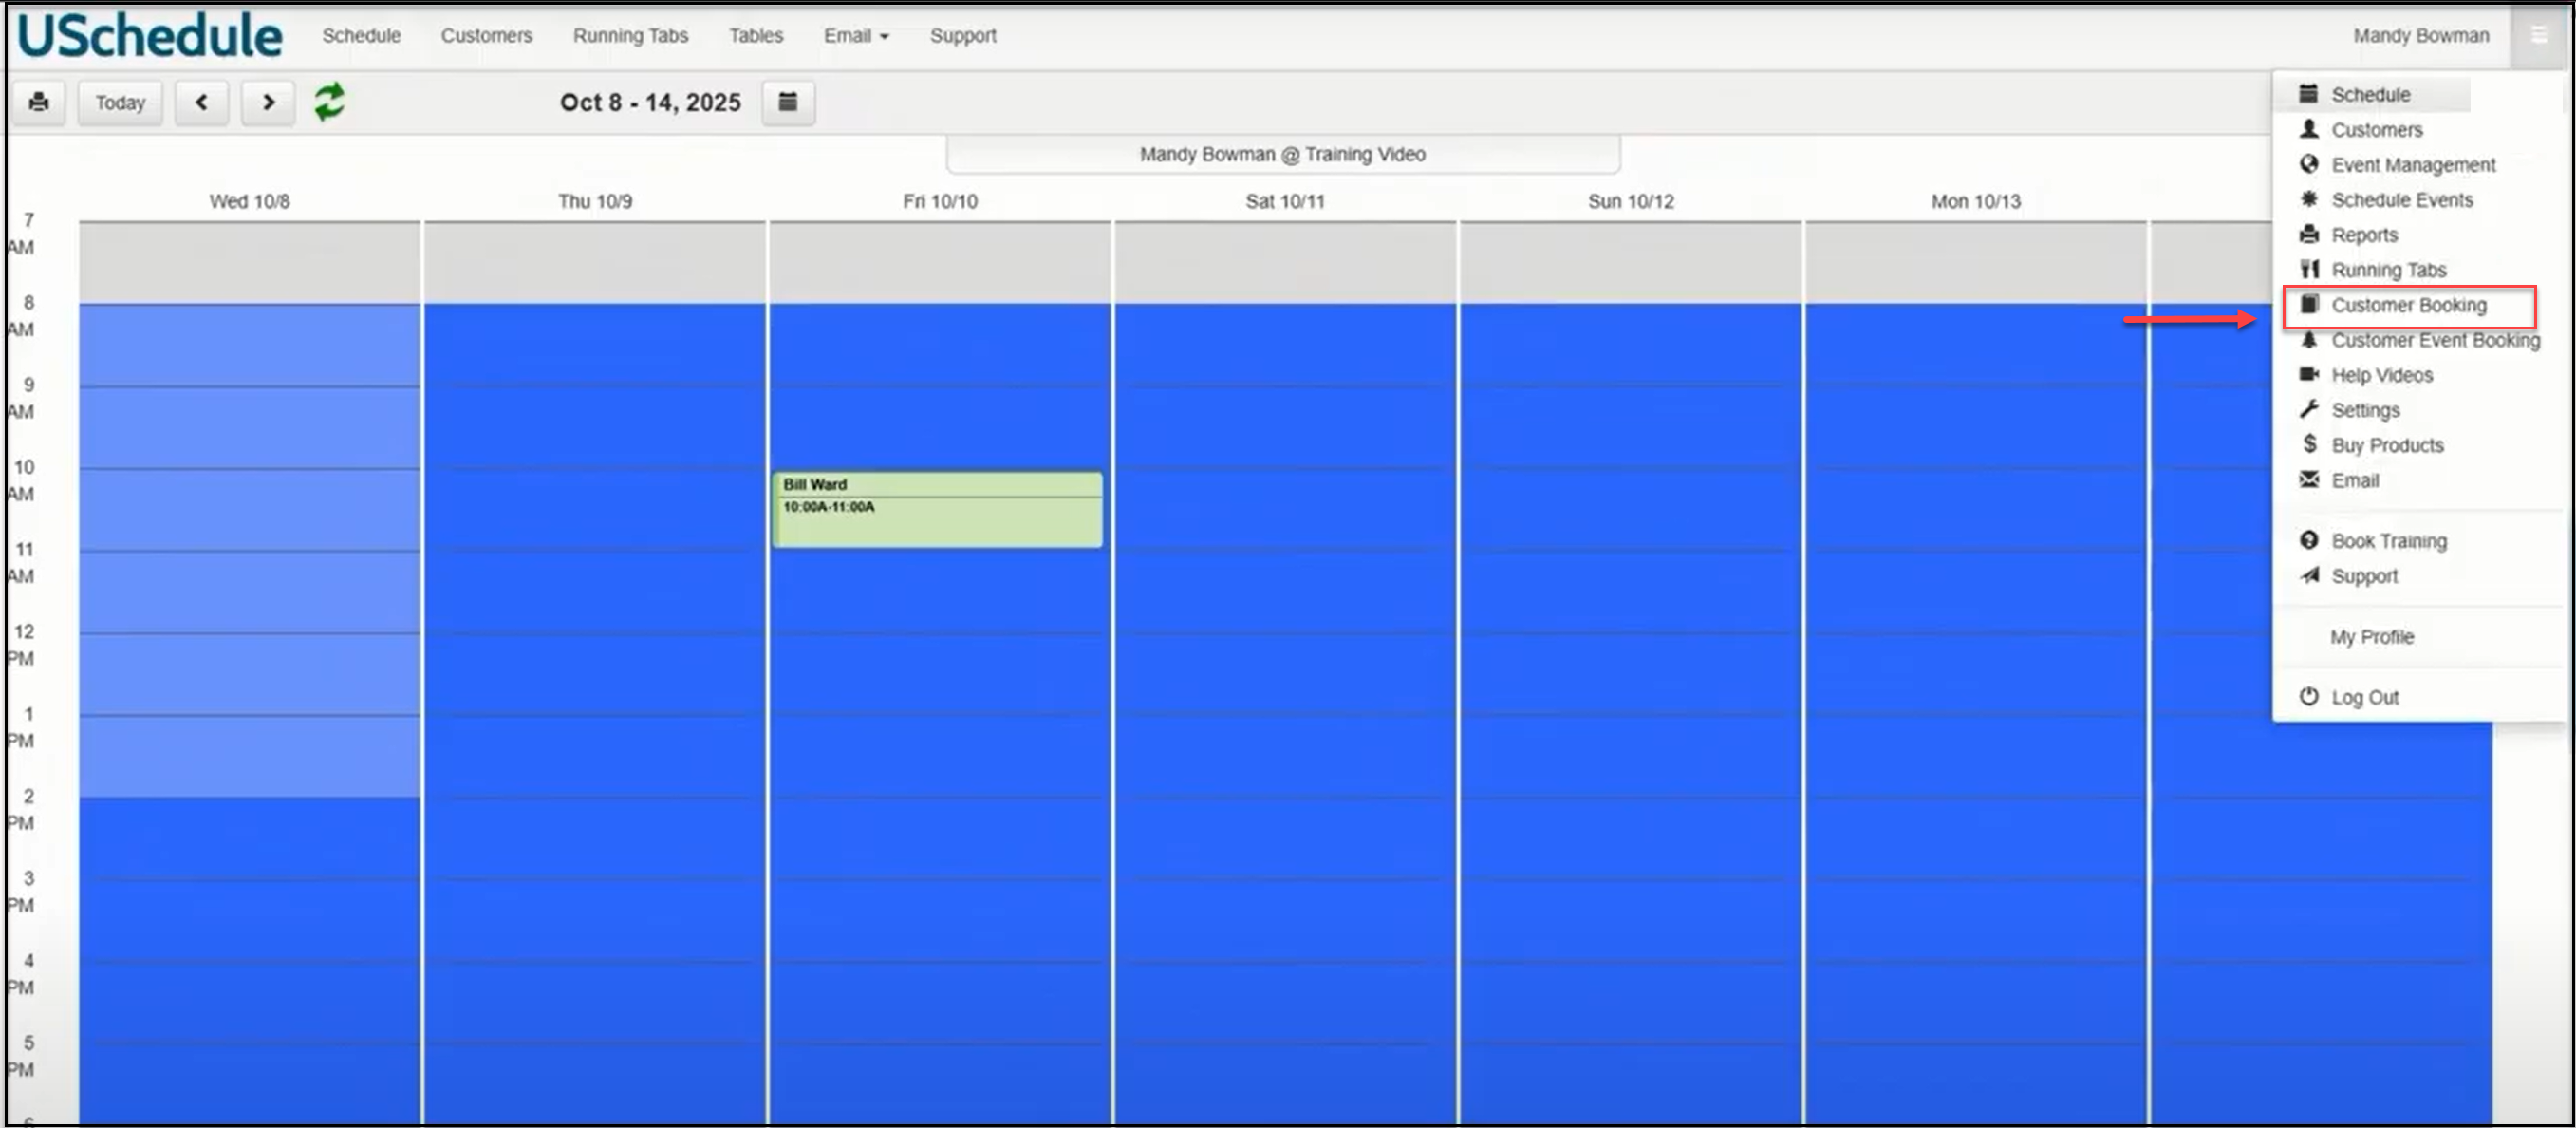
If your customers are going to book their own appointments, they will use the Customer Booking page found in your navigation menu:
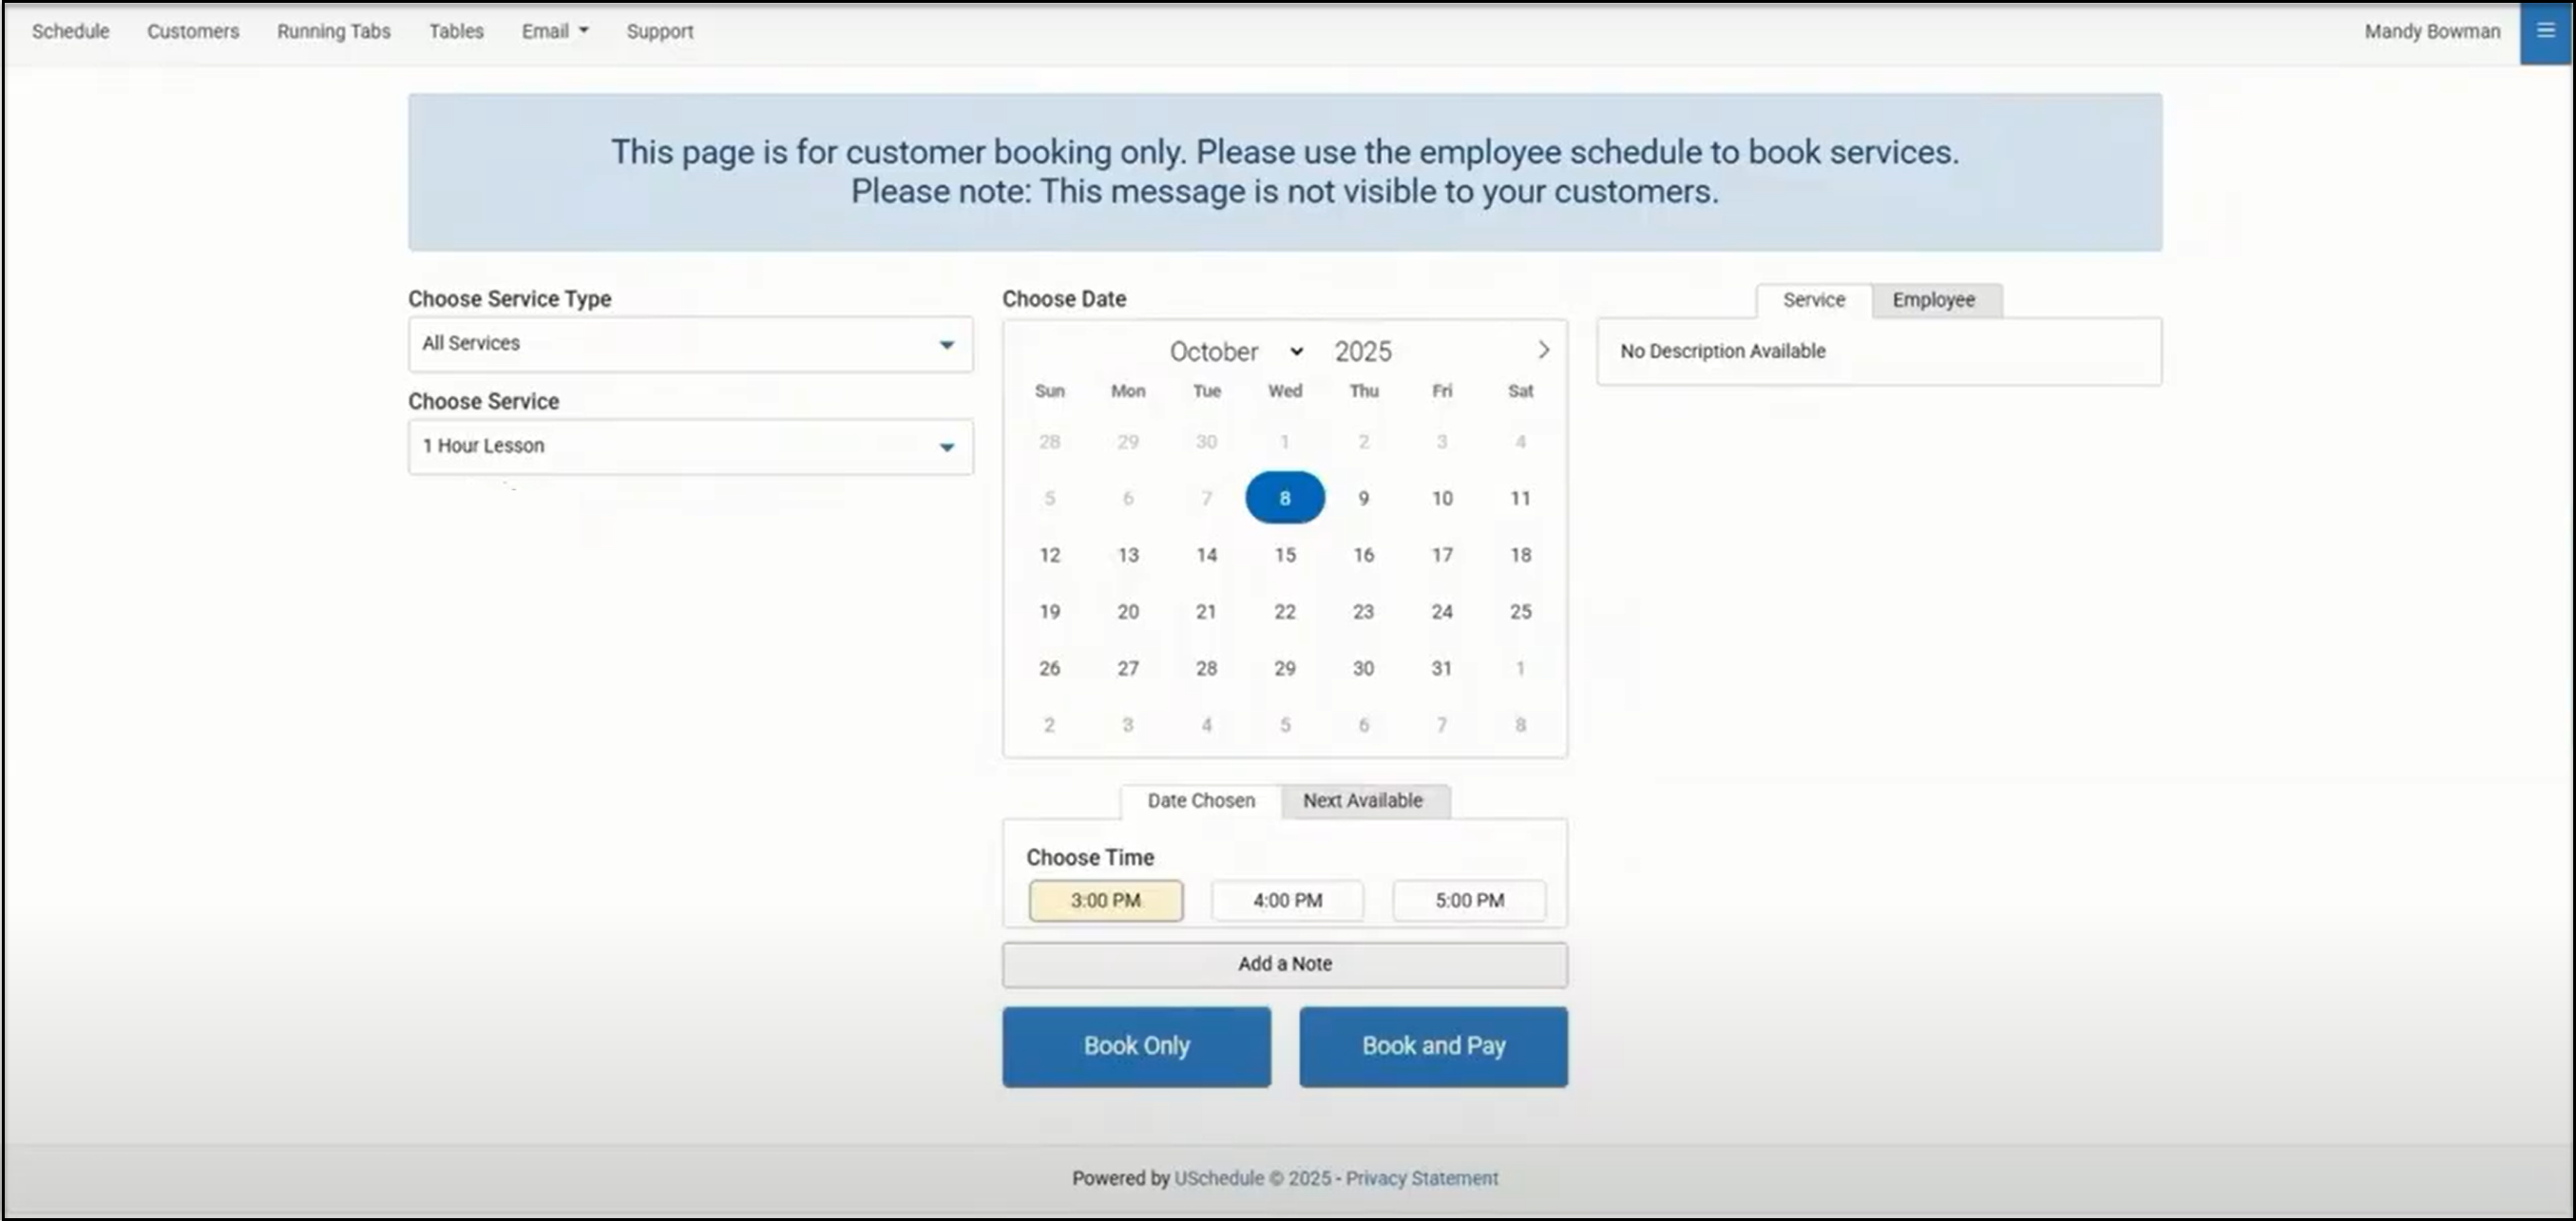
The Customer Booking page shows services, durations, simulators if those are available for booking, date and time information:
To get back to the customer appointment that was booked on your calendar, click the Schedule button:
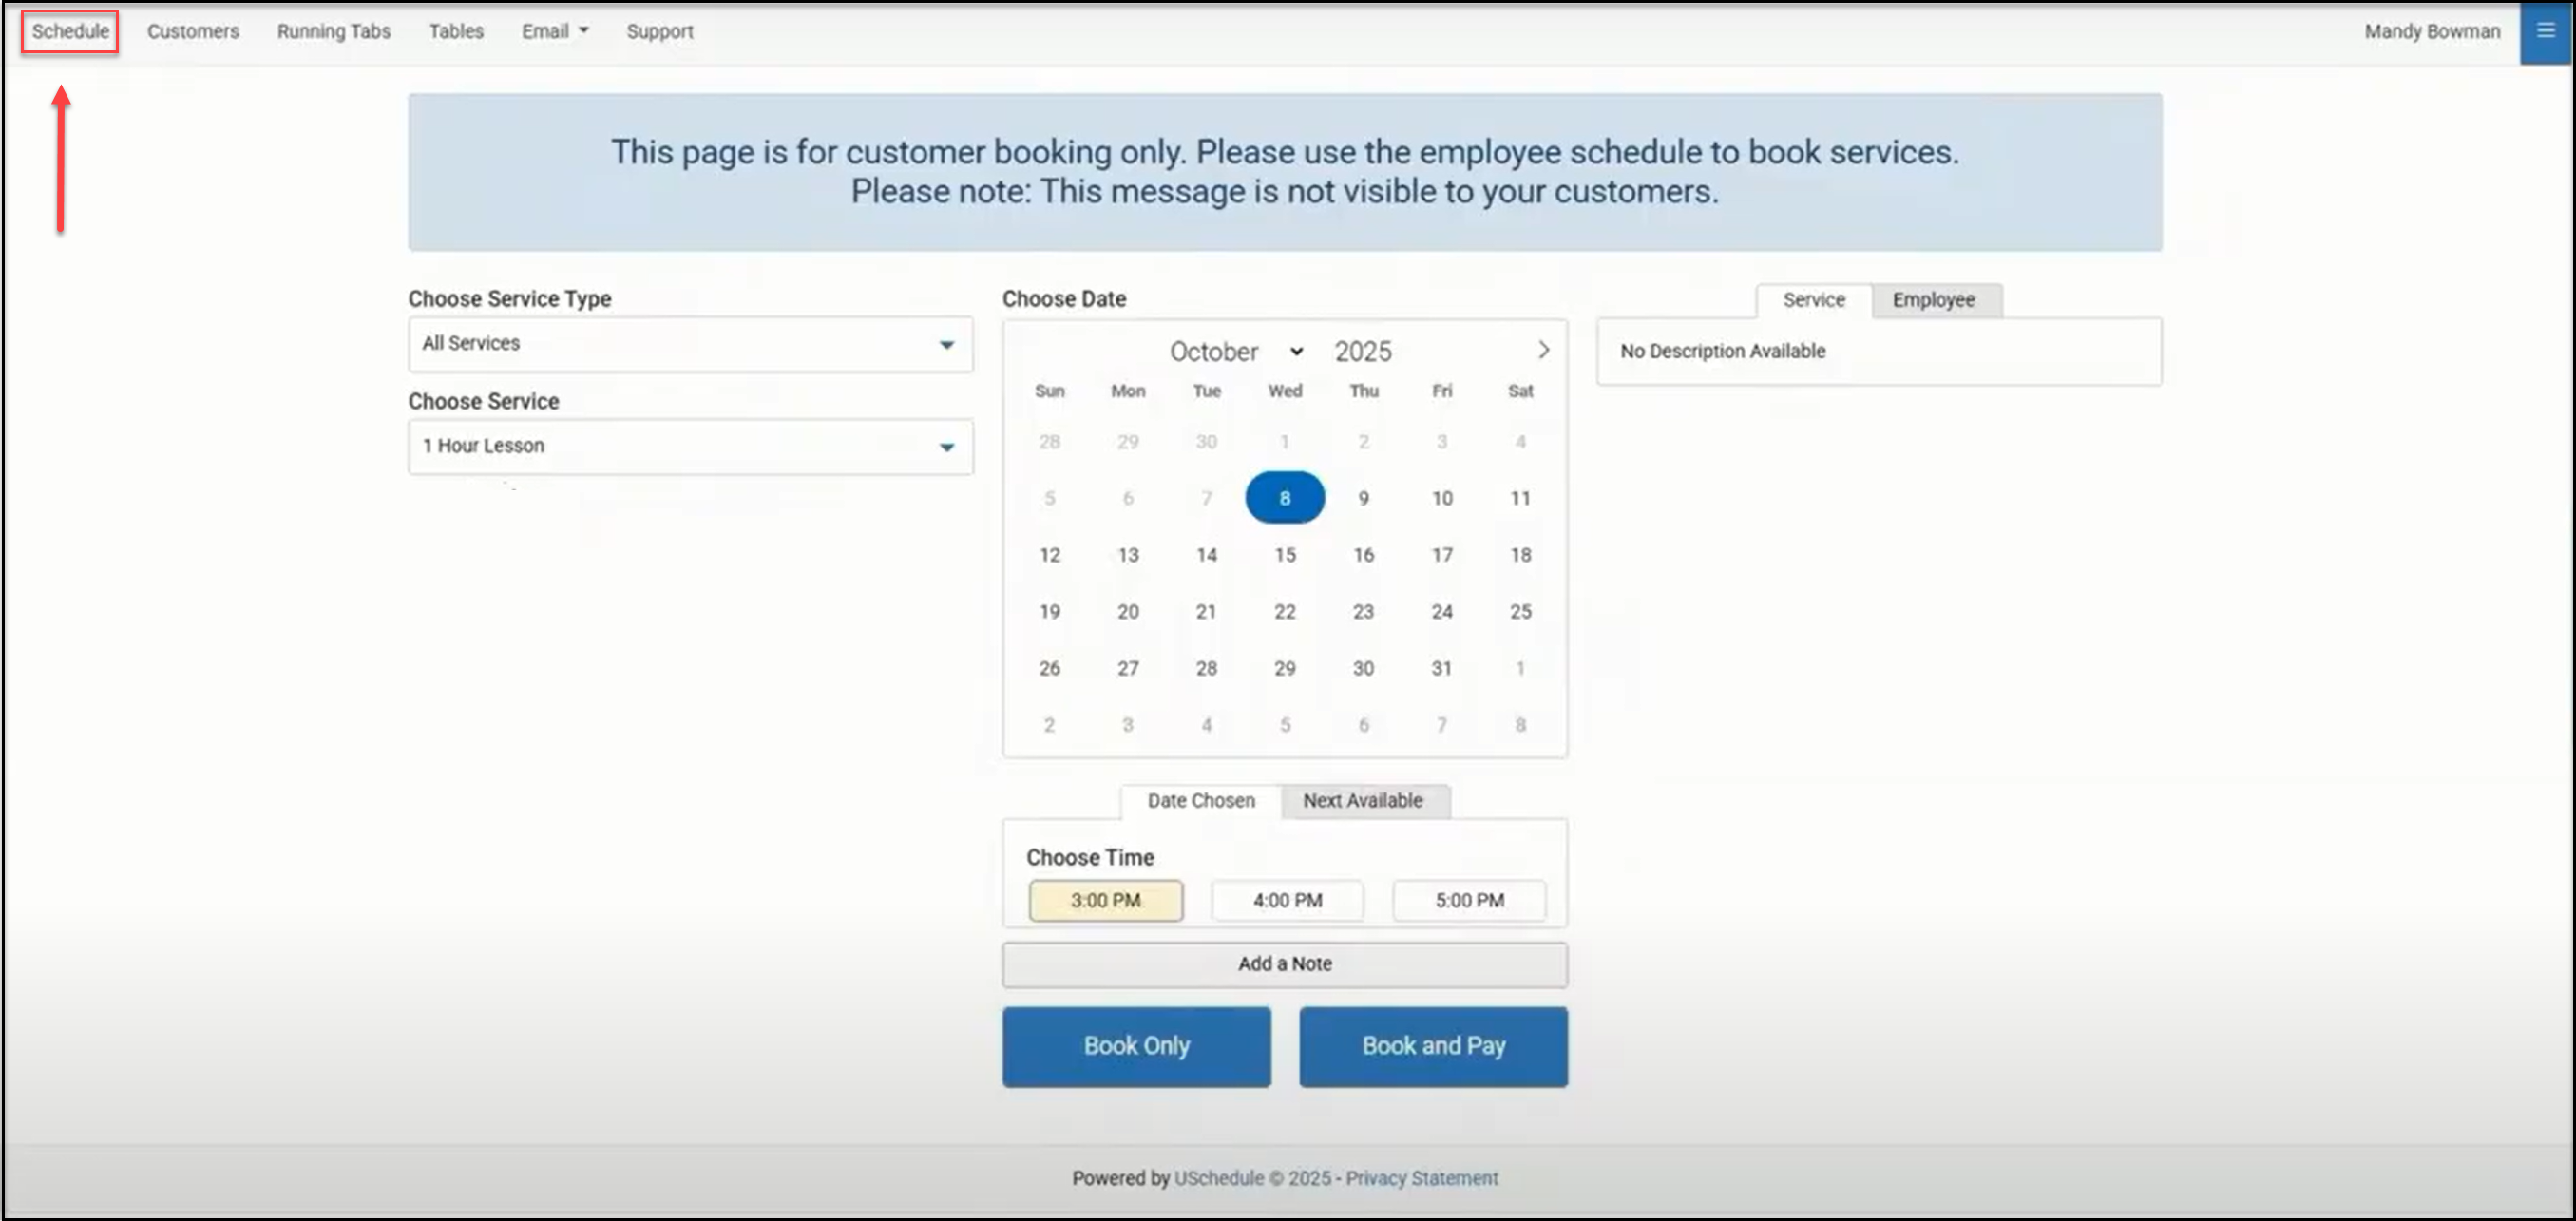
This brings you back to the Employee Calendar view: